Our Hobbit Hole Playhouse Tour

When we moved into our home last year, this pueblo-style playhouse had been built into the basement by the previous owners. I immediately knew I wanted to turn it into a Hobbit Hole for our children (and let’s be honest, myself), but it took me a while to come up with a good plan and find the time to get started.
However, with all of our time spent at home during quarantine, I’ve finally managed to finish it! This was such a fun project and I’m so happy with how it turned out. The kids helped me with a lot of it — I hope they’ll have fond memories of painting together.
I saved a lot of my inspiration on a pinterest board here if you’re interested.
Our Hobbit Hole Playhouse Tour
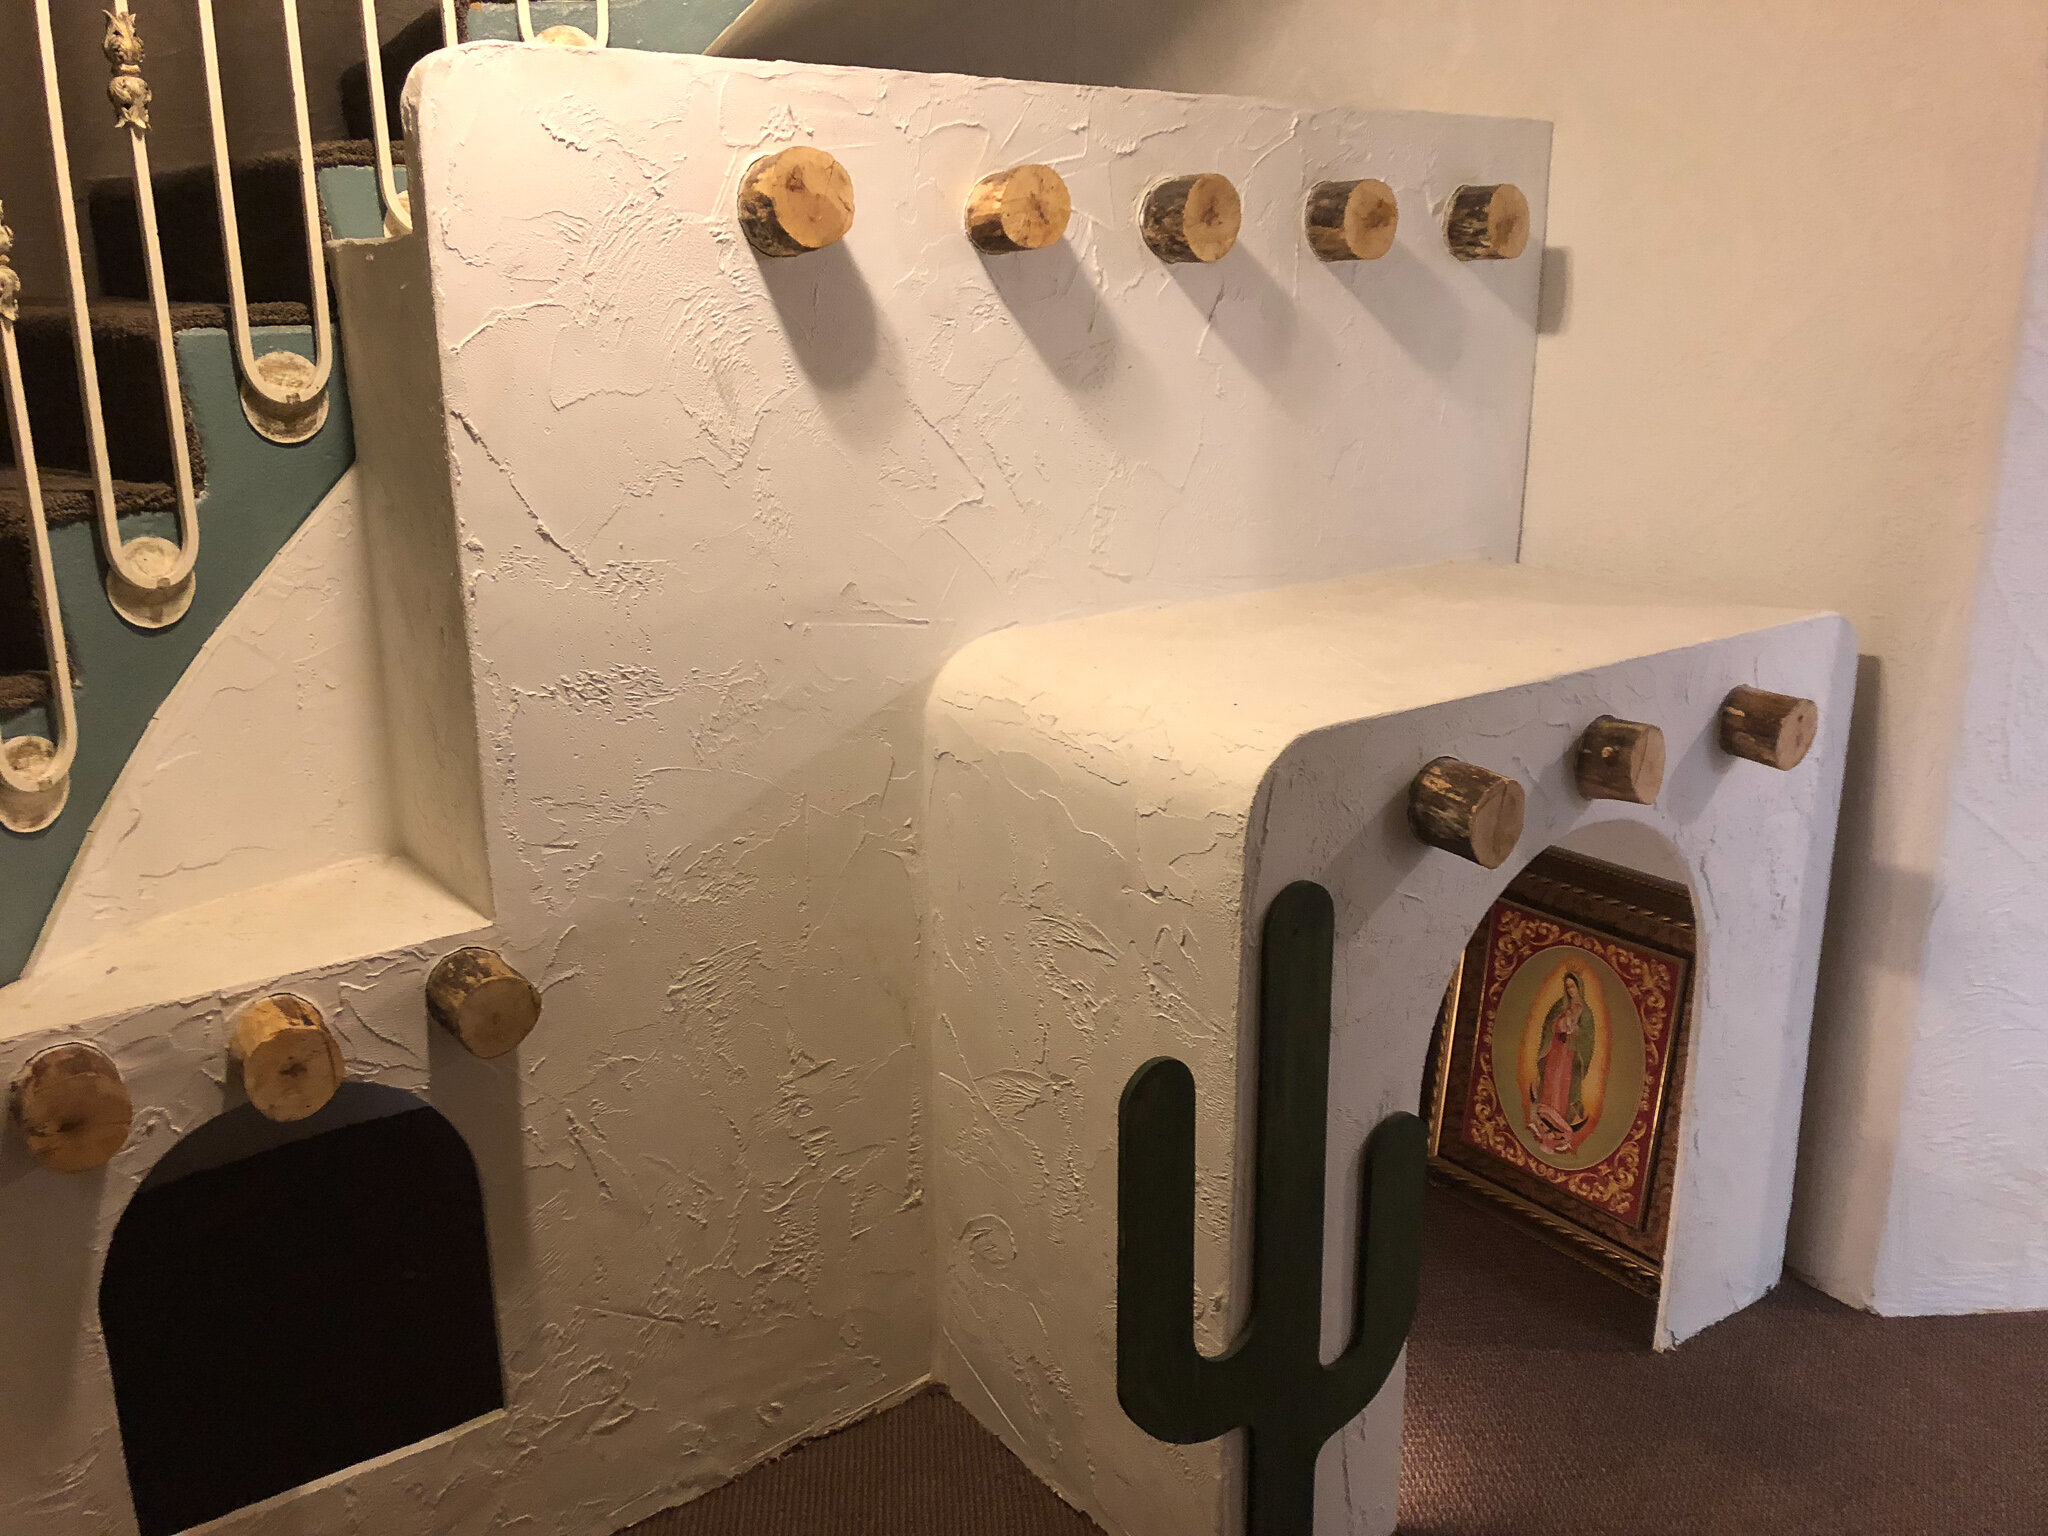
For context, this is what it looked like when we moved in: the whole thing was white. I didn’t want to do anything expensive or difficult, so instead of changing the structure at all, I just painted it. And don’t worry, we found a better home for Our Lady of Guadalupe. :)
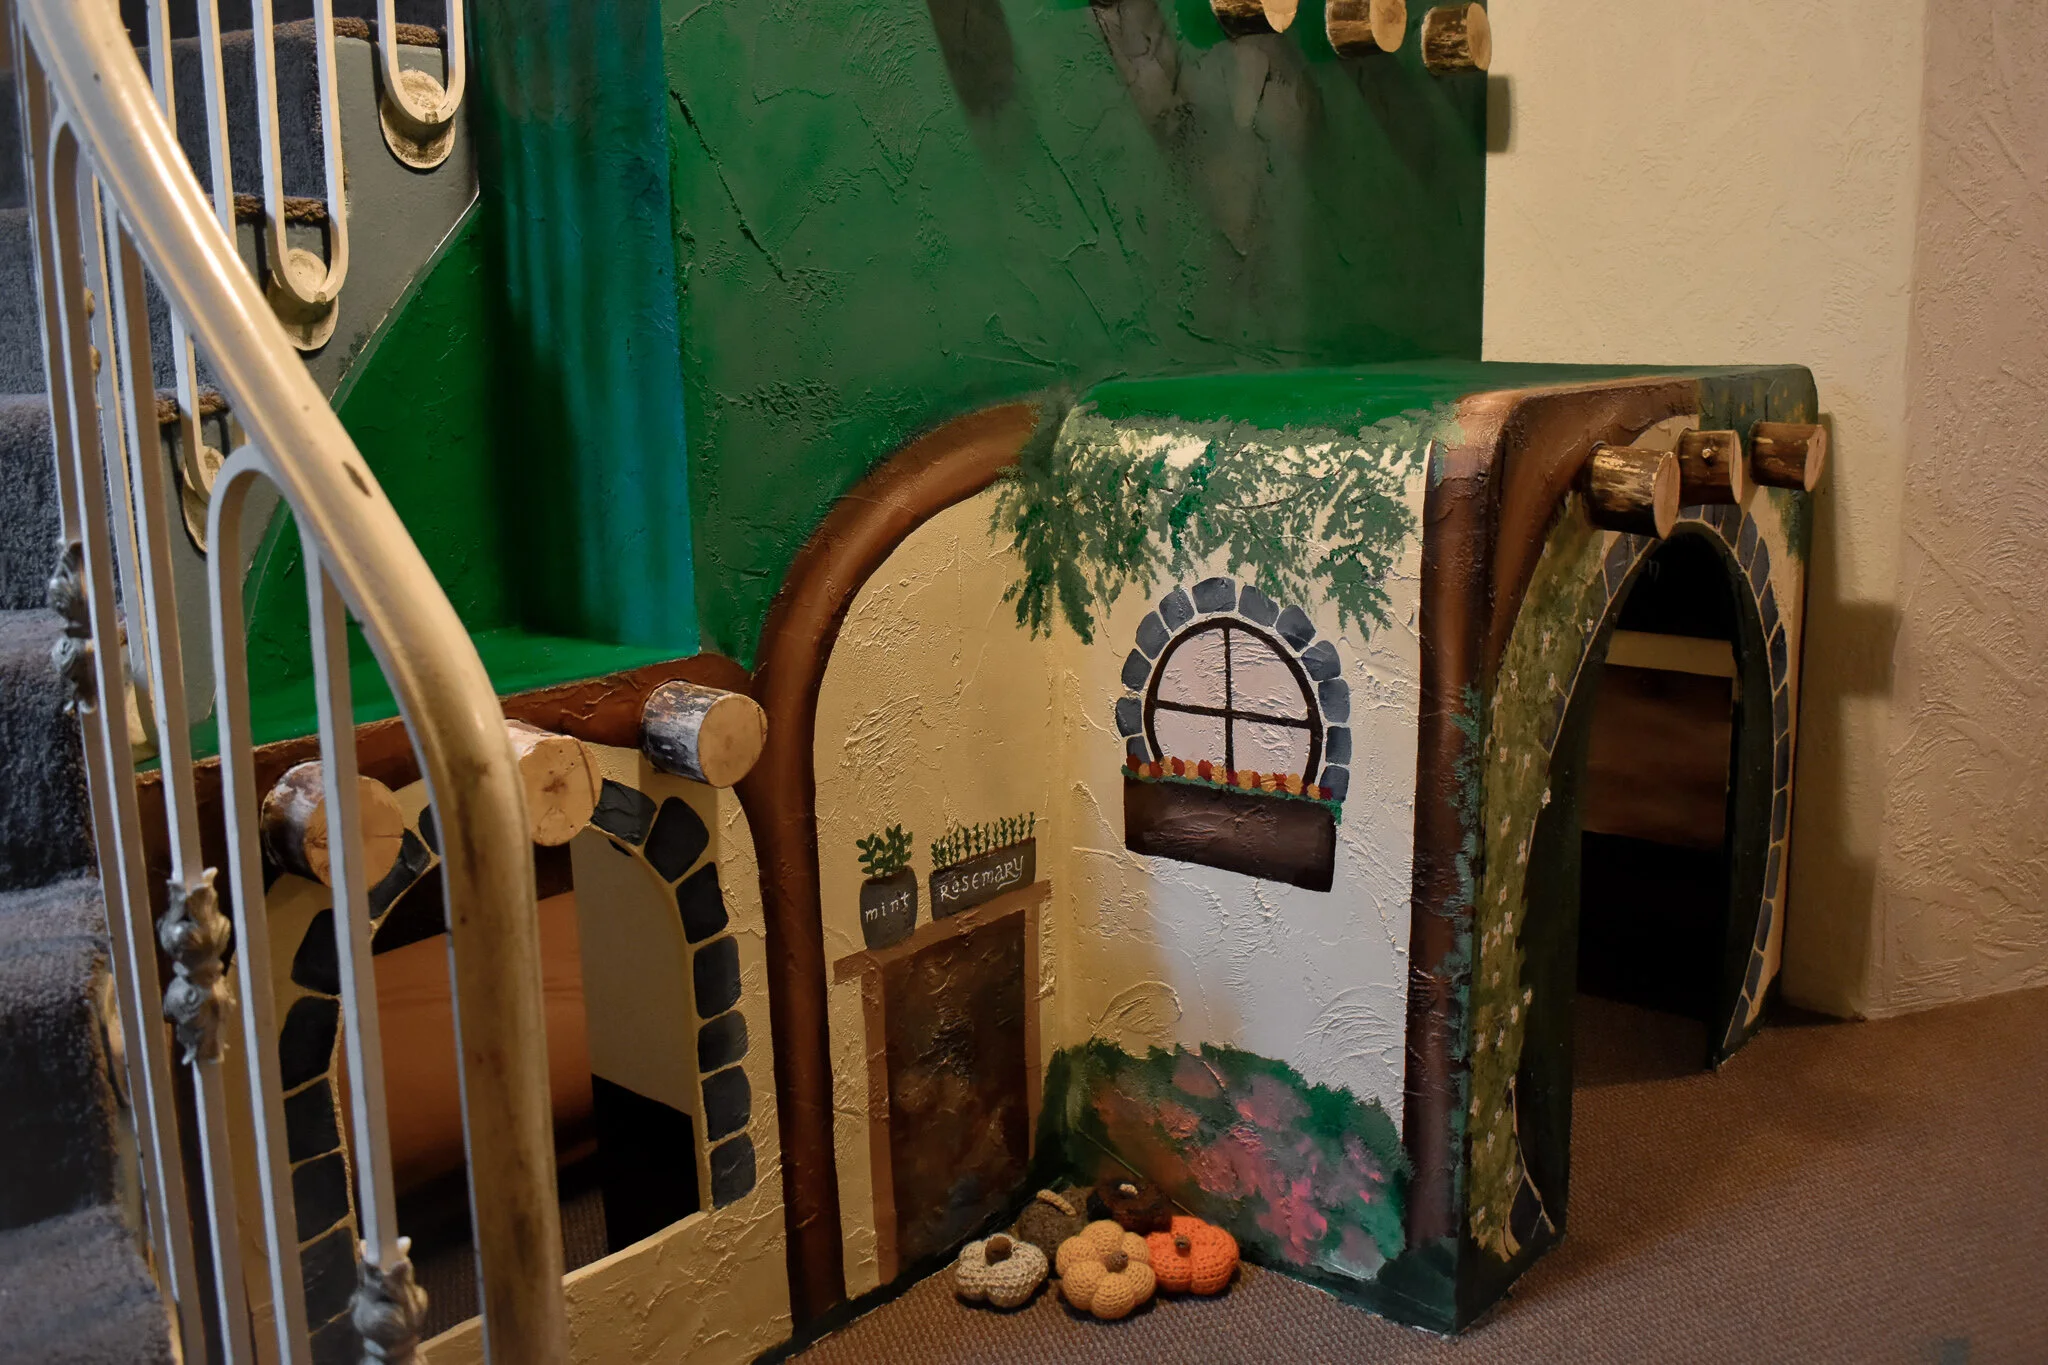
Homely Exterior
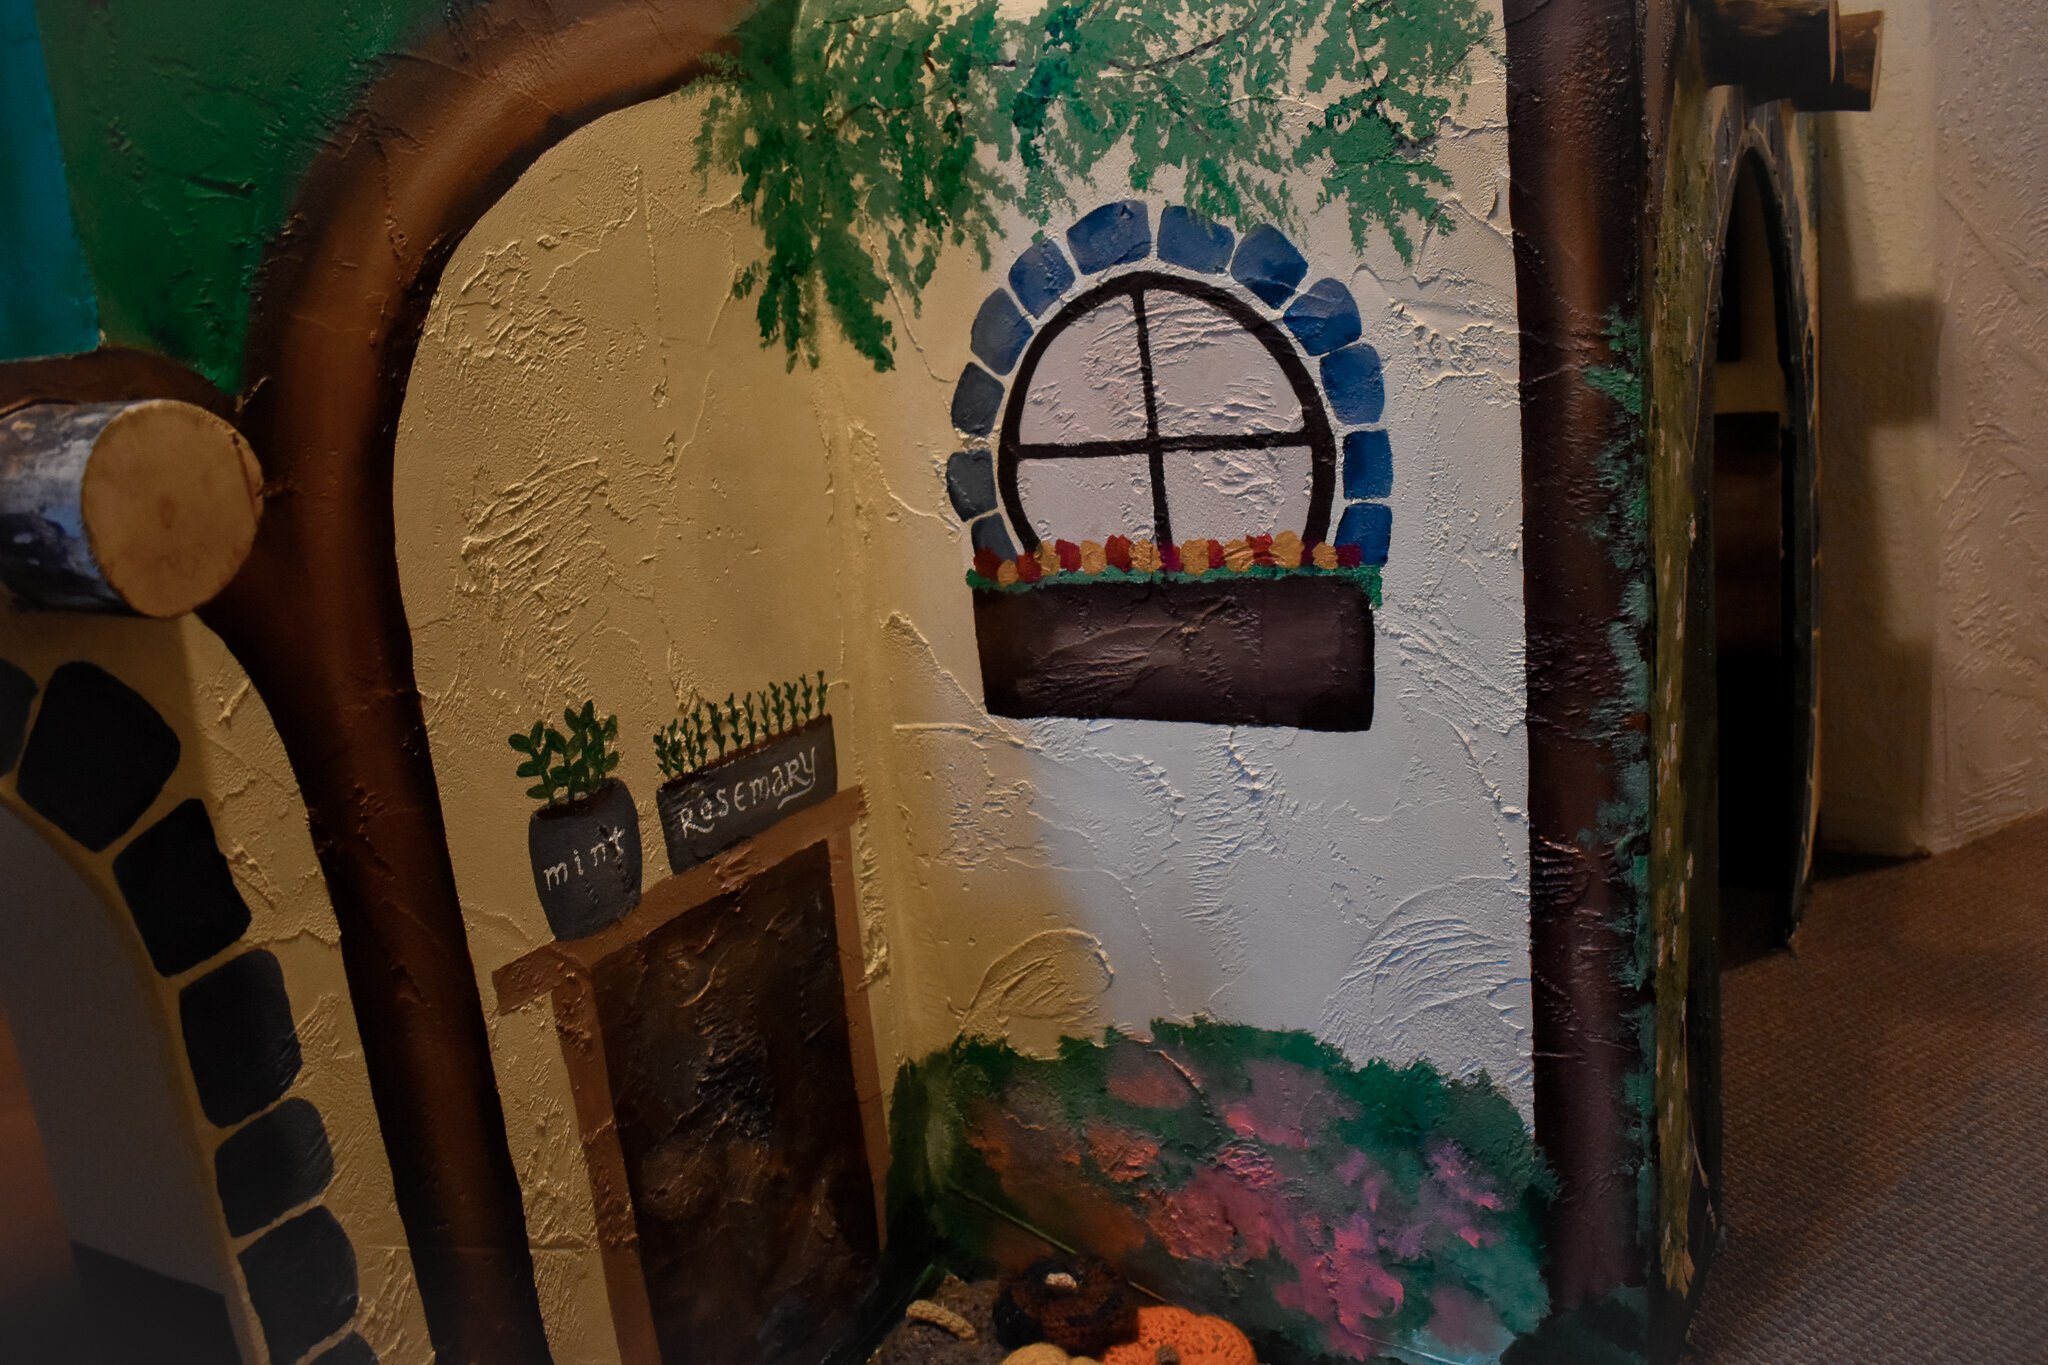
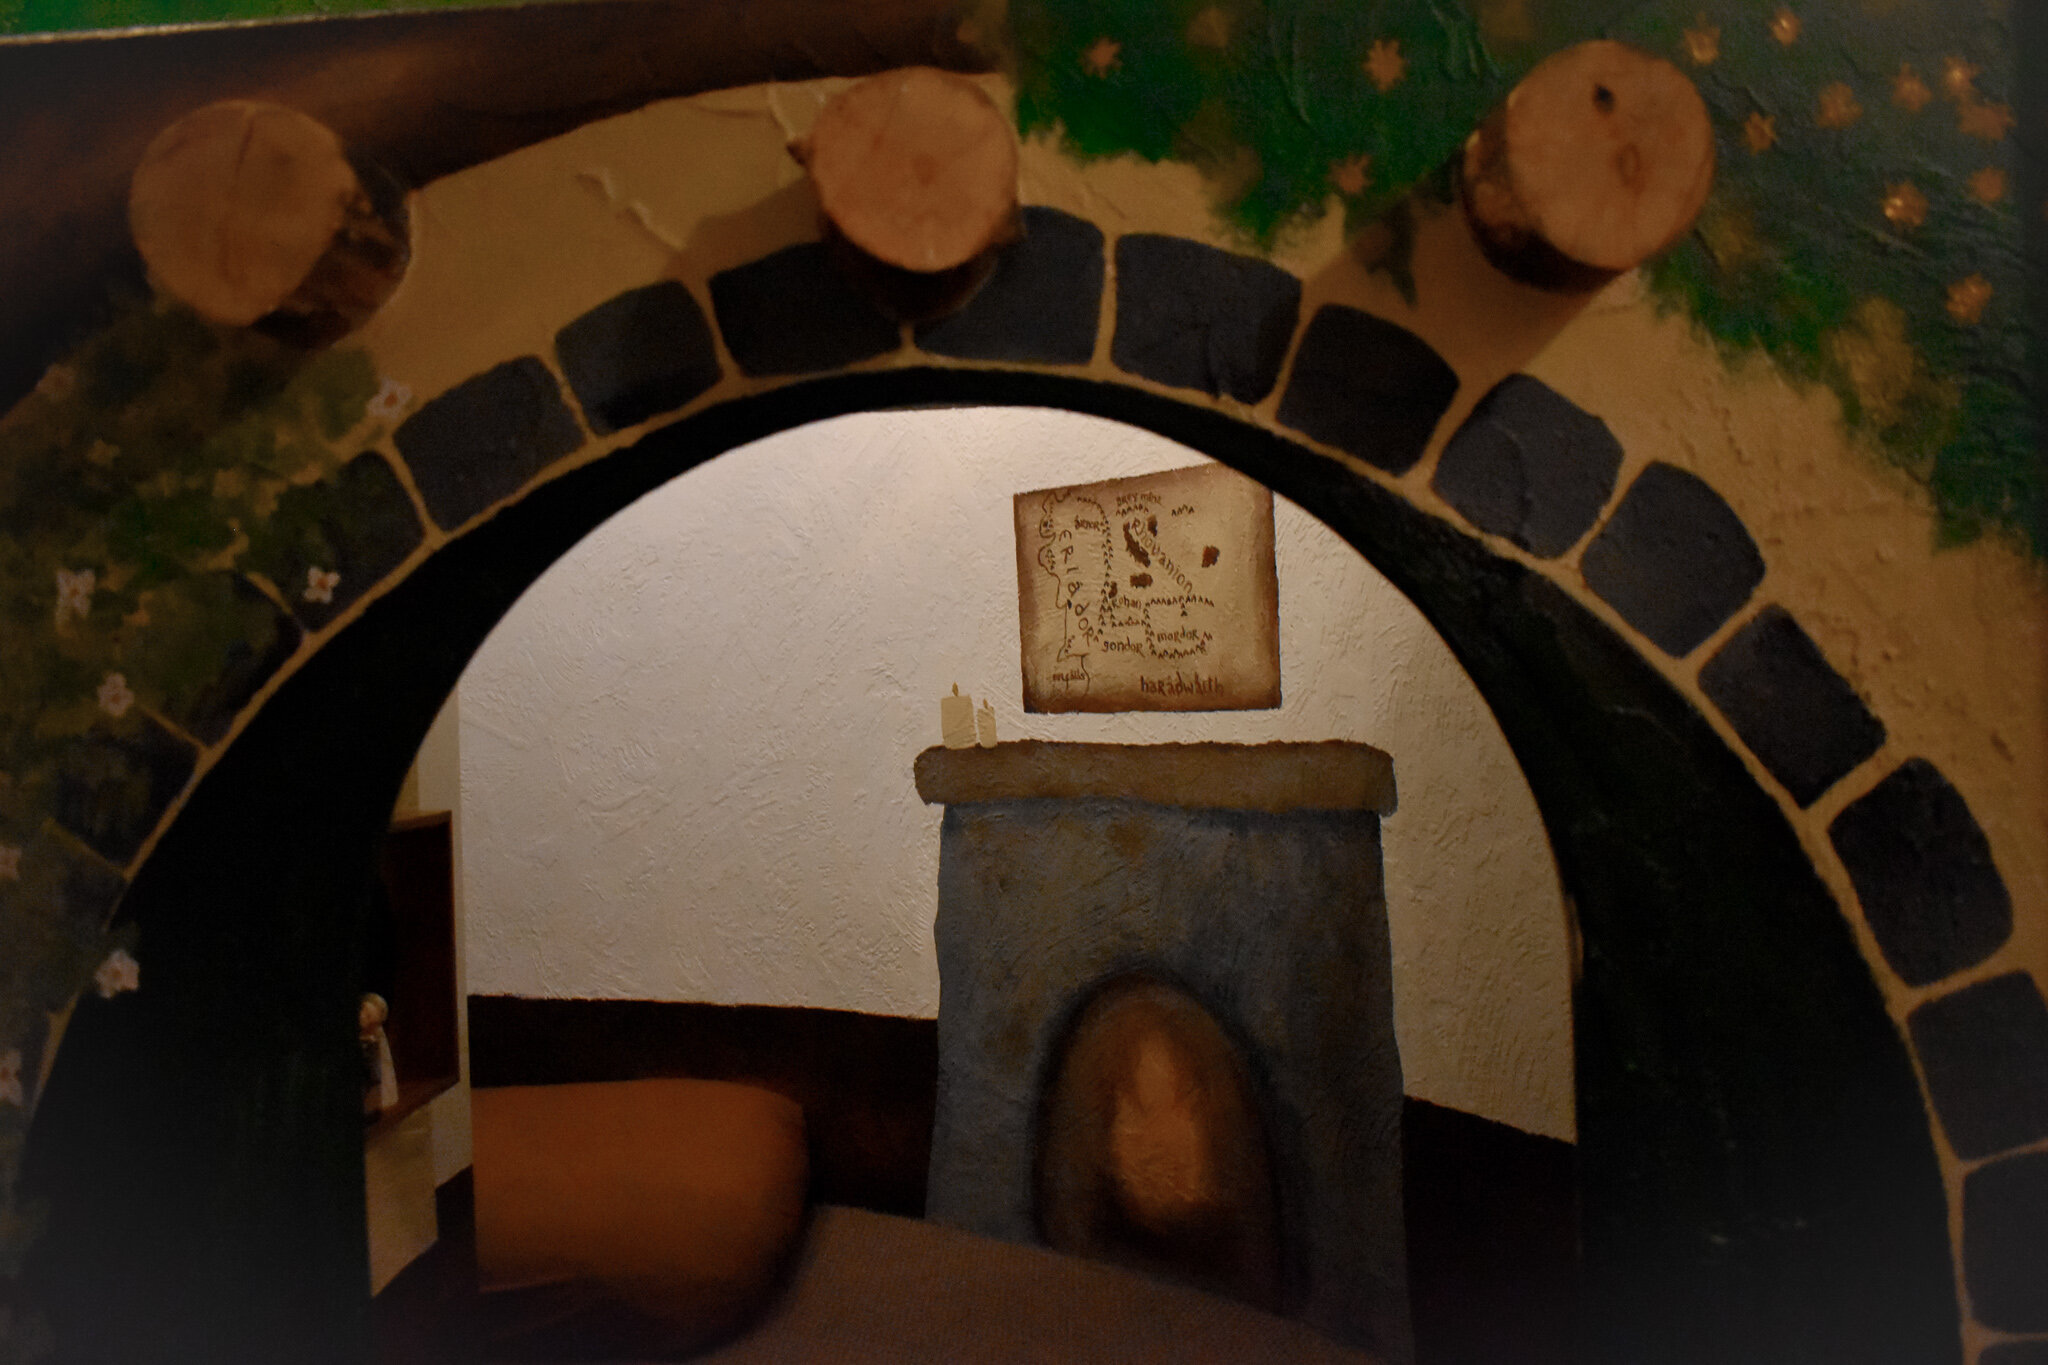
I wanted the Hobbit Hole Playhouse to be something whimsical and fun, so I kept it relatively simple to avoid it feeling too busy. The base is beige with medium-wood accents and a stone border around the door and windows. Our home has a lot of grey stone in it, so I wanted to incorporate that style to bring it all together. Because the original playhouse had a slightly arched (but not circular) door, I tried to paint the “door” on to create that hobbity feel. And of course, plants and grass everywhere!


“It was a Hobble-Hole, And That Means Comfort”
When we moved in, the inside of the playhouse was completely empty — just white walls, and maybe a few spiderwebs. There weren’t any lights inside and it was terribly dark, so the kids never played in the playhouse (probably also because of the spiderwebs). Once we cleaned it up and added battery-power remote control lights and one strand of twinkle lights, they felt a lot more comfortable inside.


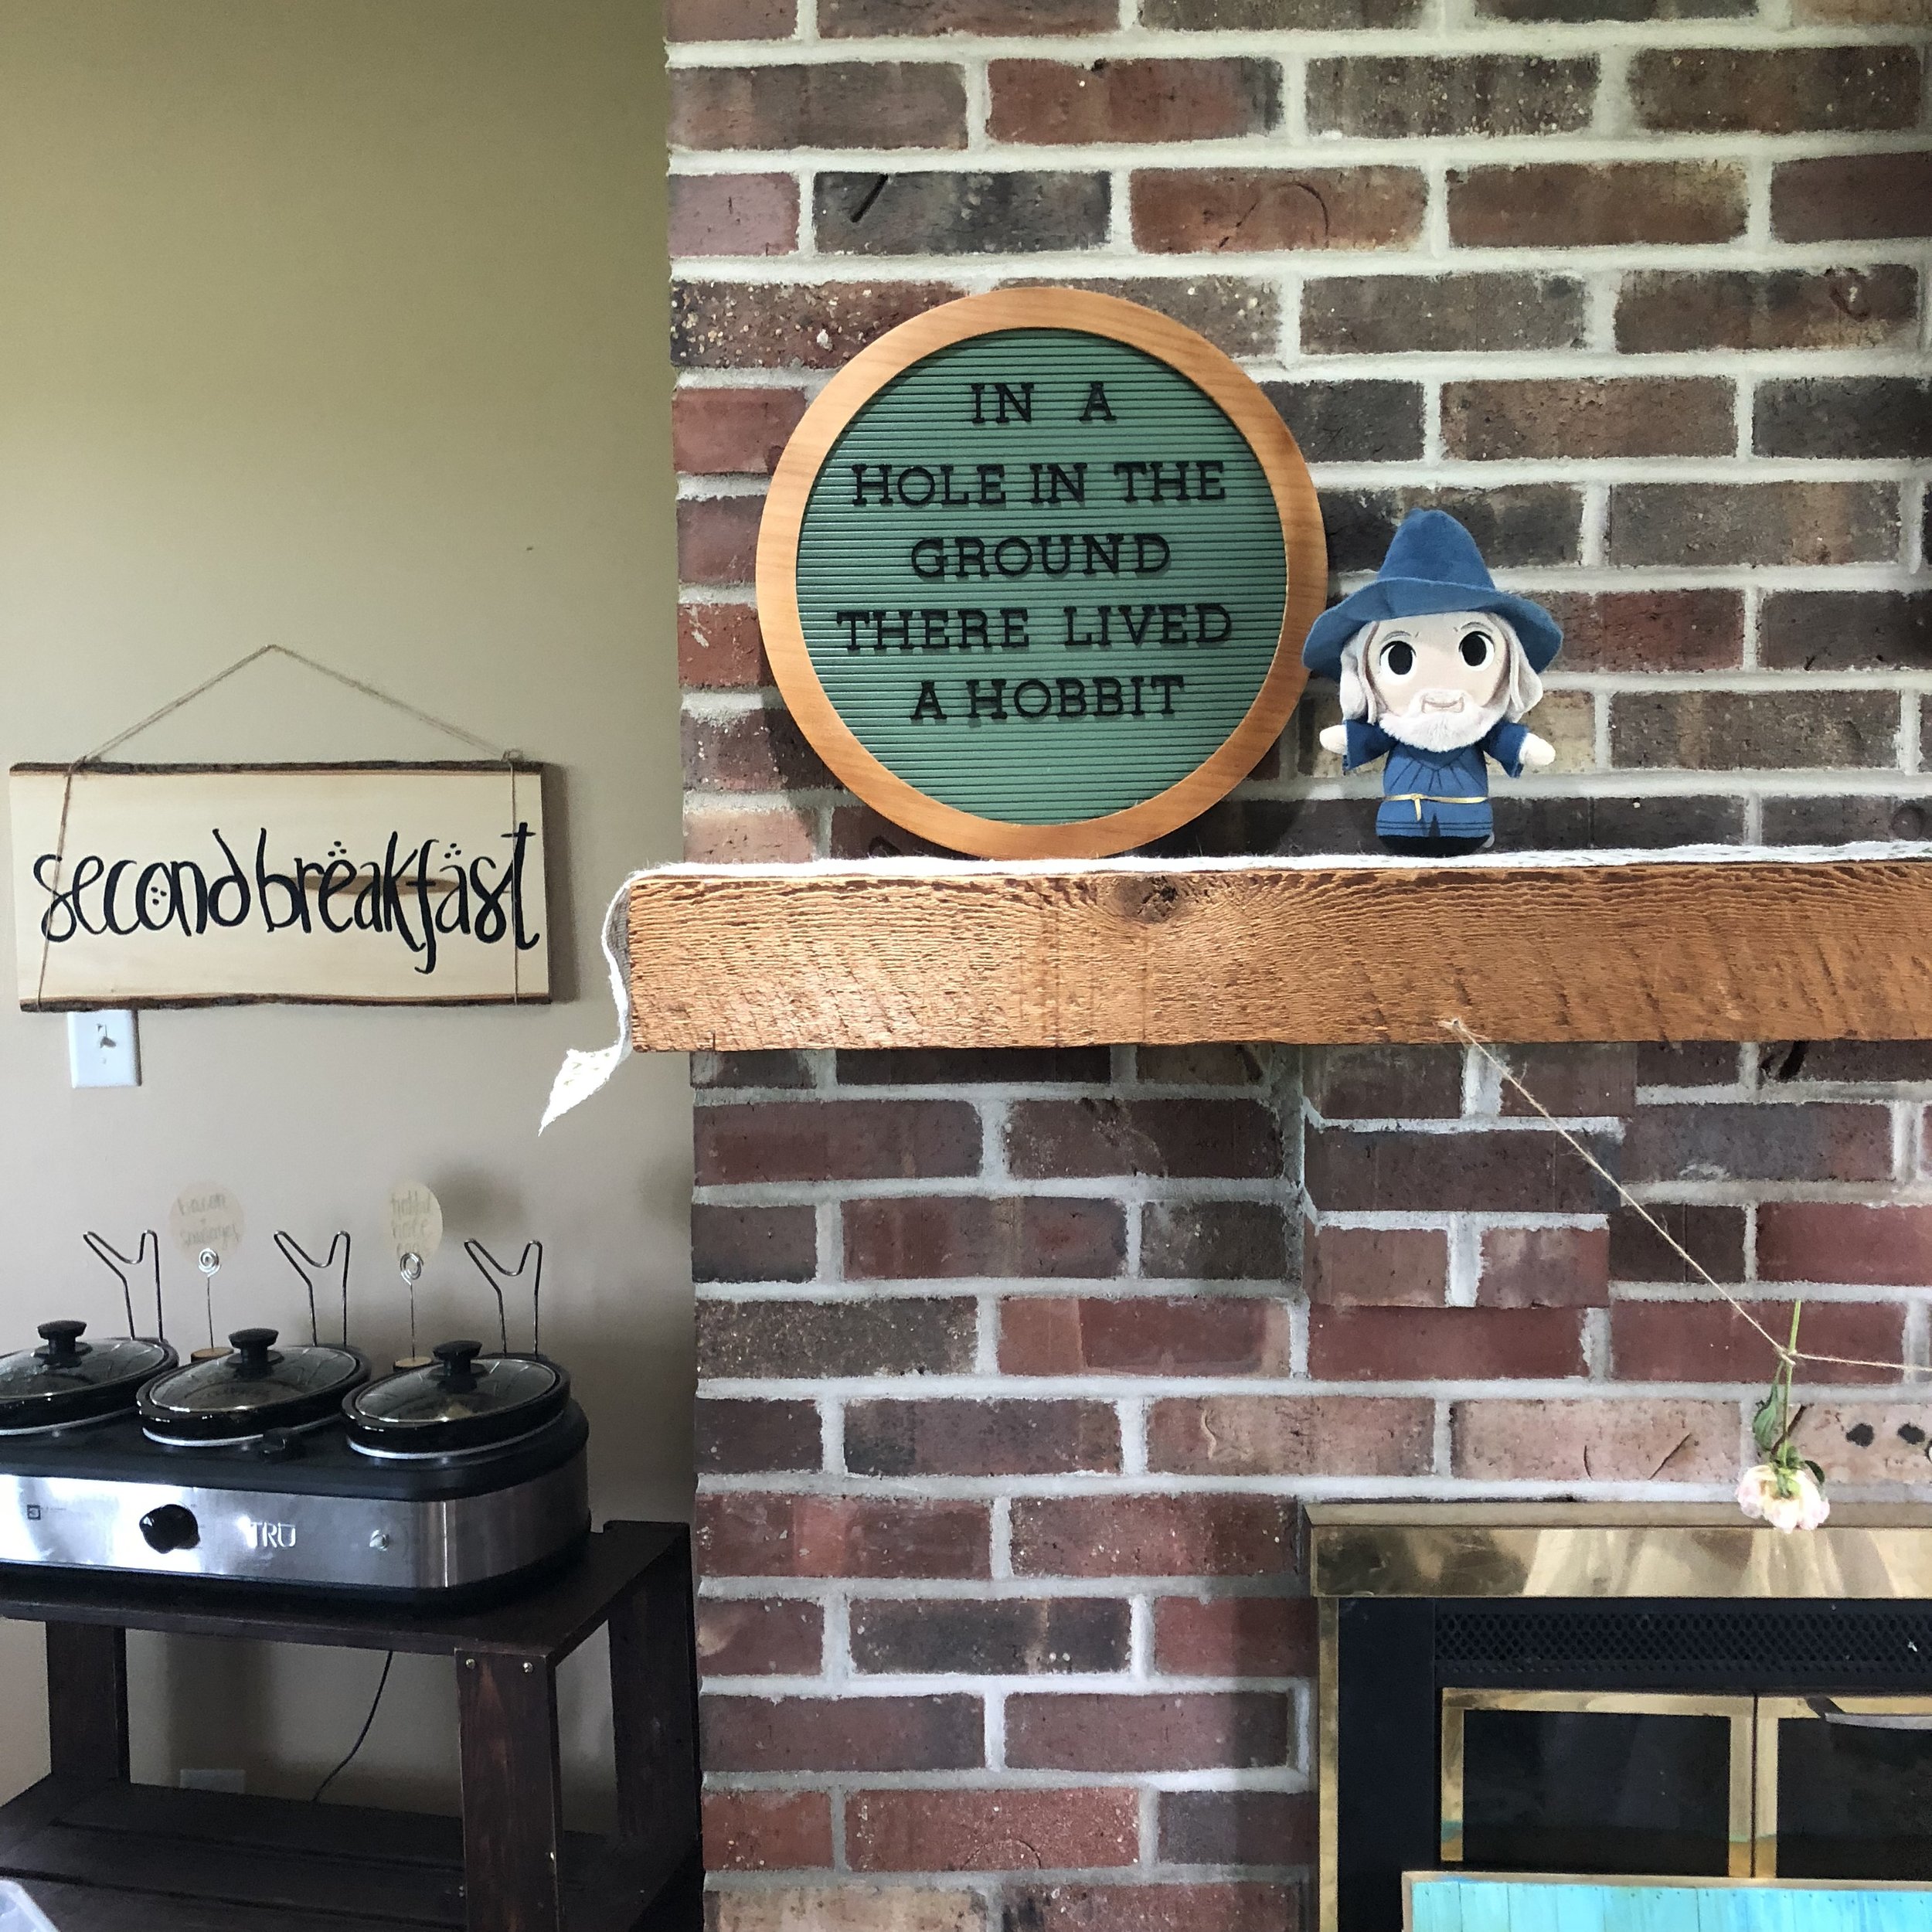
I wanted to create an entryway-feel to this area, so I added these little knobs for them to hang their cloaks on, as well as a little pouch to serve as a mailbox and a chalkboard. I had this little hobbit-door wooden frame and Eowyn and Faramir peg dolls so I put them up on the wall for the little ones to play with.


The inside of the Hobbit Hole is surprisingly roomy — I can stand up at the tallest point of the room, because it’s under our staircase! I added a thick strip of dark brown paint along the bottom of the wall because I knew little hands and feet would be making little messes down here, plus it looks like wood paneling which is very hobbity.
The bookshelf is meant to be like a little dollhouse for all of our pop funko figures — we’ve accumulated a lot over the years! And then I’ve also rounded up all the peg dolls I could find around the house and brought them down here. There are also some books on the lowest shelf to encourage the kids to read more.
Also, my (woefully inaccurate) map of Middle-Earth above the fireplace is probably my favorite part of this whole thing. People who are really passionate about map accuracy should not look too closely, but it really ties it together in my opinion and reminds me of ol’ Bilbo Baggins.
These mattresses are actually futon chair mattresses, which happen to be the same size as a crib mattress. I got some brown sheets to keep them clean. I had actually only ordered one mattress but was accidentally shipped two, which worked out great. They’re super comfy to lay on and read.

The Hobbit Hole Playhouse is my favorite thing about our home right now and I’m so excited to see how the kids enjoy it in the coming years. My oldest daughter has told me she wants to start her own little book club and have it meet in the Hobbit Hole which was the sweetest thing to hear, and seeing my toddler playing with the little peg dolls on the shelf brings me so much joy.
Anyways, thanks so much for reading about our Hobbit Hole Playhouse! It really was so much fun for me to paint and I’m so happy to share about it with you. If you have any questions about supplies or creating your own Hobbit Hole Playhouse, I’d love to help — leave a comment here or @ me on twitter.